
INSTRUCTIONS
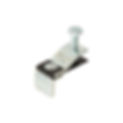
SINKITS SLOT CLIPS

Sinkits slot-klips instructions
Determine the number of Sinkits Slot-Klips required. Mark the locations to be drilled approximately 1” from sink rim. Using an appropriate blade, cut a slot to a depth of ½”.
Bend tab away from Slot-Klip body (this will preload the clamp to enable it to stay inserted until tightened), insert clamp fully into the slot, making sure anchor post bottoms out in the hole or clamp body rest against sink rim. Tighten clamp against sink rim. Do not over tighten.
Important: Binding tab must be bent far enough to create pressure when inserting clamp.

Watch a quick demonstration video below
Disclaimer and limitation of liabilities: Sinkits Slot-Klips are designed for the purpose of attaching undermount sinks to solid surfaces such as stone, quartz or products of similar characteristics. The end user must determine the number of clamps and placement required to properly complete the task and that the substrate the clamps are being inserted into has the characteristics needed to support the product being attached. Persons installing Sinkits Slot-Klips must be familiar with the process of undermounting sinks beneath countertops and that person assumes the responsibility of insuring the clamps are properly secured. All responsibility as to the appropriate use of this product is the responsibility of the user. This product is intended to be used by professional personnel who are competent to evaluate the limitations and proper placement and application of its intended use and that person should accept the responsibility that the product is adequately installed.